OPINION - mIxing is routing, clip gain, phase alignment
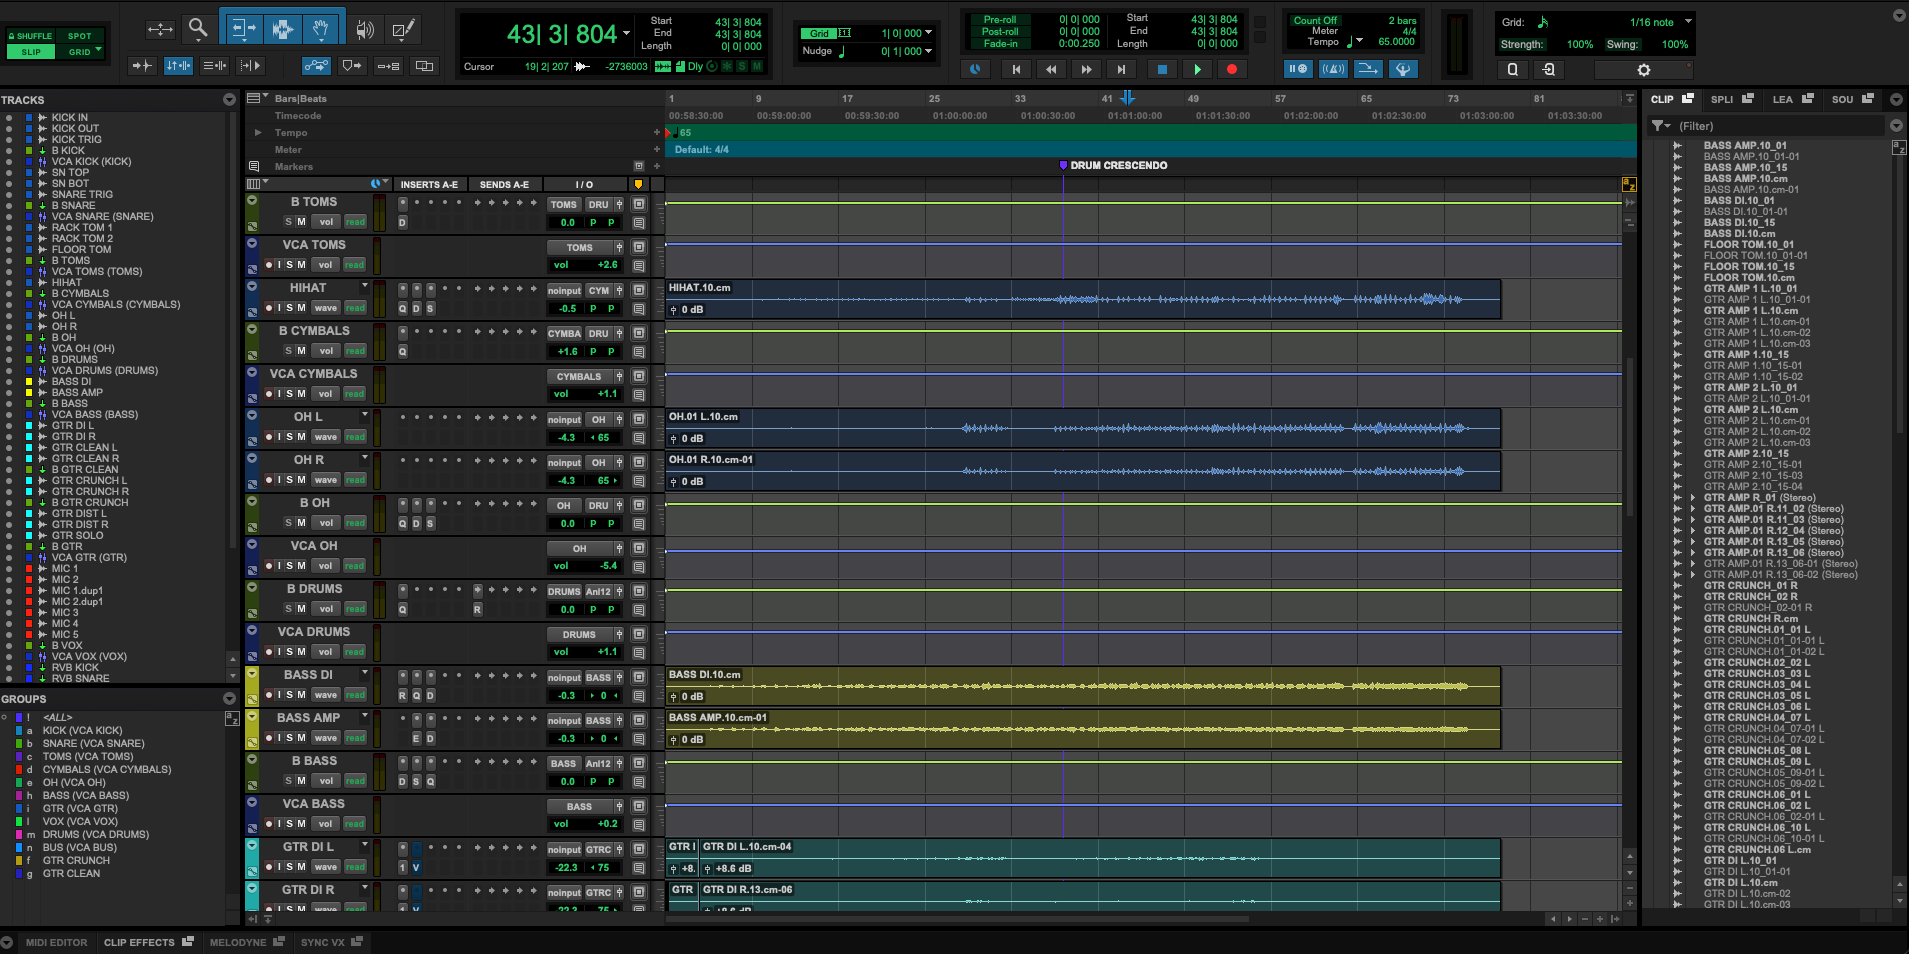
Before a single plug-in gets opened, most of a mix is already decided: how the tracks are named, grouped, routed, gain-staged and time-aligned. That’s what this post is about. What you’re looking at is my session from 2024, when I recorded and mixed friends of mine from uni. The band broke up and they won’t let me put the song online, so you only get the screenshots - which is fine, because the way a mix gets built is largely universal.
You’re looking at the Edit window. This is where clip gain lives, and where you do time alignment, phase nudges, polarity flips (everyone says phase invert) and commits. Fancy jargon for very simple actions: moving audio around, and deciding how loud a piece of it is before anything else touches it.
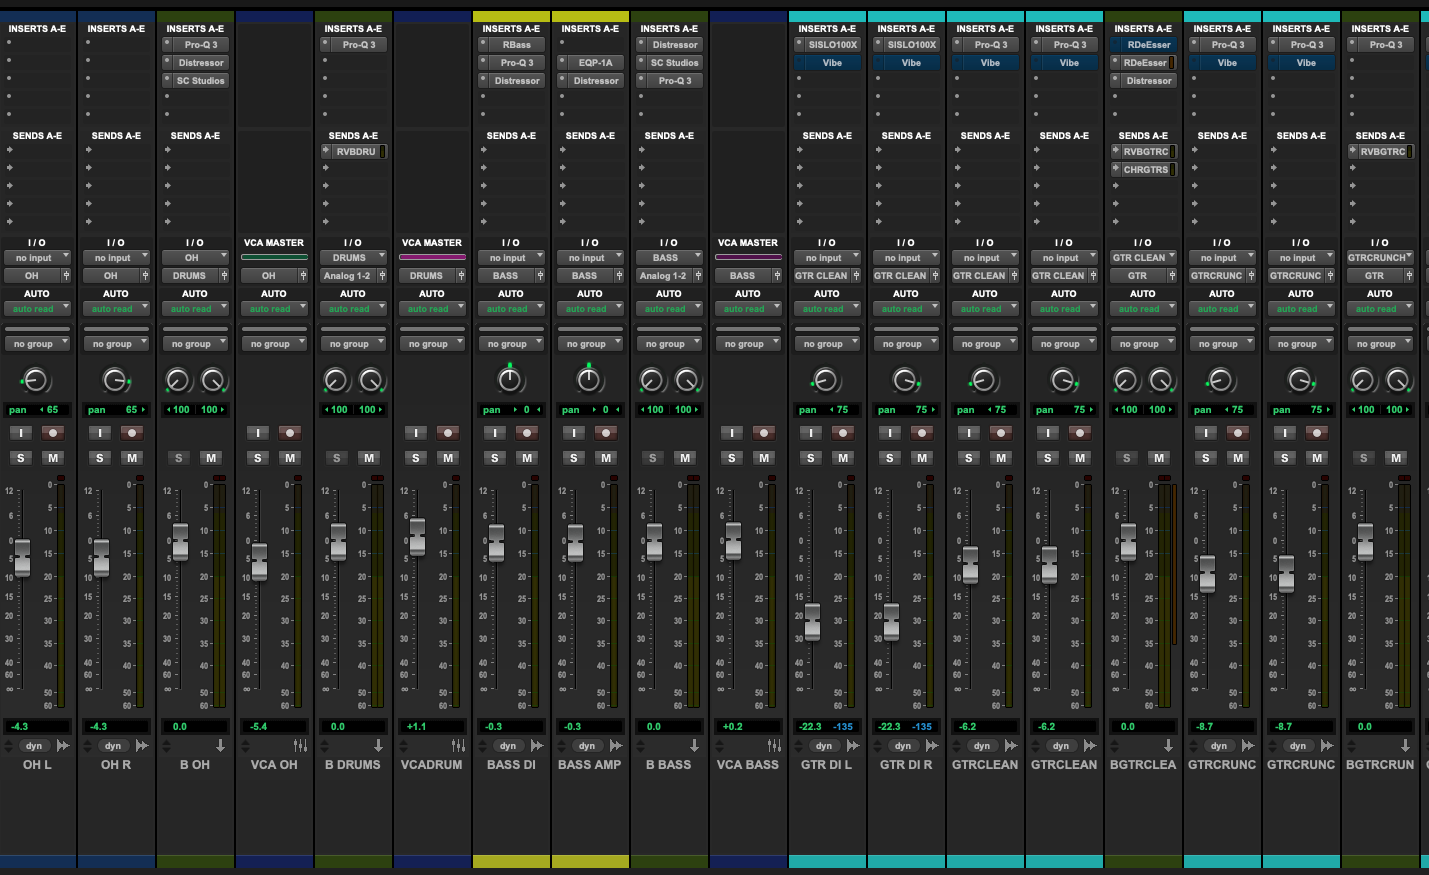
You’re looking at the Mix window, which lays the session out like a console: a channel strip per track, inserts at the top, sends under them, then I/O, pan, and the fader. Pro Tools didn’t invent that layout and it’s not the only DAW that uses it, but it landed early in professional studios, and between its editing workflow and the hardware built around it, it became the default in a lot of studios and in post. That’s habit and infrastructure as much as merit.
You’ll notice tracks named BUSS (I shorten it to B) and tracks named VCA, and faders sitting at all sorts of levels. Those two are not the same thing: a buss - an aux input - actually sums audio, so the drum tracks feed into it and you can process the sum. A VCA passes no audio at all, it scales the faders of every track assigned to it, so the balance you set inside the group stays intact. Setting the level relationships across all of that is what balancing means. Pro Tools mixes in floating point so the internal sum won’t break, but the output has a hard ceiling and anything modelling analog gear cares about level, so I leave headroom anyway. Some tracks sit far below the rest and still do work - notice the two GTR DI tracks pulled way down but still active. I liked what they added underneath the amped guitars, so I kept them.
I want to say this loudly, because I don’t see it come up much. Most of the mixing talk I read is about plug-in A versus plug-in B, or which one is AI-powered now. I don’t like mixes that are technical for the sake of it, where the EQ curve looks like a maths exam.
I was taught this at uni, and I don’t think it landed the way it should have. Most of us heard it and filed it under the wrong heading: we confuse setting up a mix - the FOUNDATION - with sitting in front of a plug-in for two hours - the TECHNICAL part.
Here’s what I mean by FOUNDATION:
TRACK IMPORT. NAMING. COLOURING. GROUPING - BUSSES - VCA FADERS - SENDS. ROUTING. CLIP GAIN. PHASE AND TIME ALIGNMENT. COMPING. PANNING. VOLUME FADER ADJUSTMENT
Phase alignment sits on that list and it’s the one people skip. Whenever a source is captured by more than one mic - kick in and kick out, snare top and bottom, a DI next to a mic’d cab - the same event reaches each mic at a slightly different time. Sum them and that delay cancels some frequencies and reinforces others. That isn’t a tone you chose, it’s a comb filter you inherited. So flip polarity on any mic pointing at the source from the opposite side, and nudge tracks until the transients line up. The DI against the cab is the clearest case: the DI hits the interface almost instantly while the cab has to push a metre or so of air, which is roughly three milliseconds late. Slide it and the guitars go from thin to solid without touching an EQ. Do this before you EQ, otherwise you’re EQ-ing the cancellation instead of the sound.
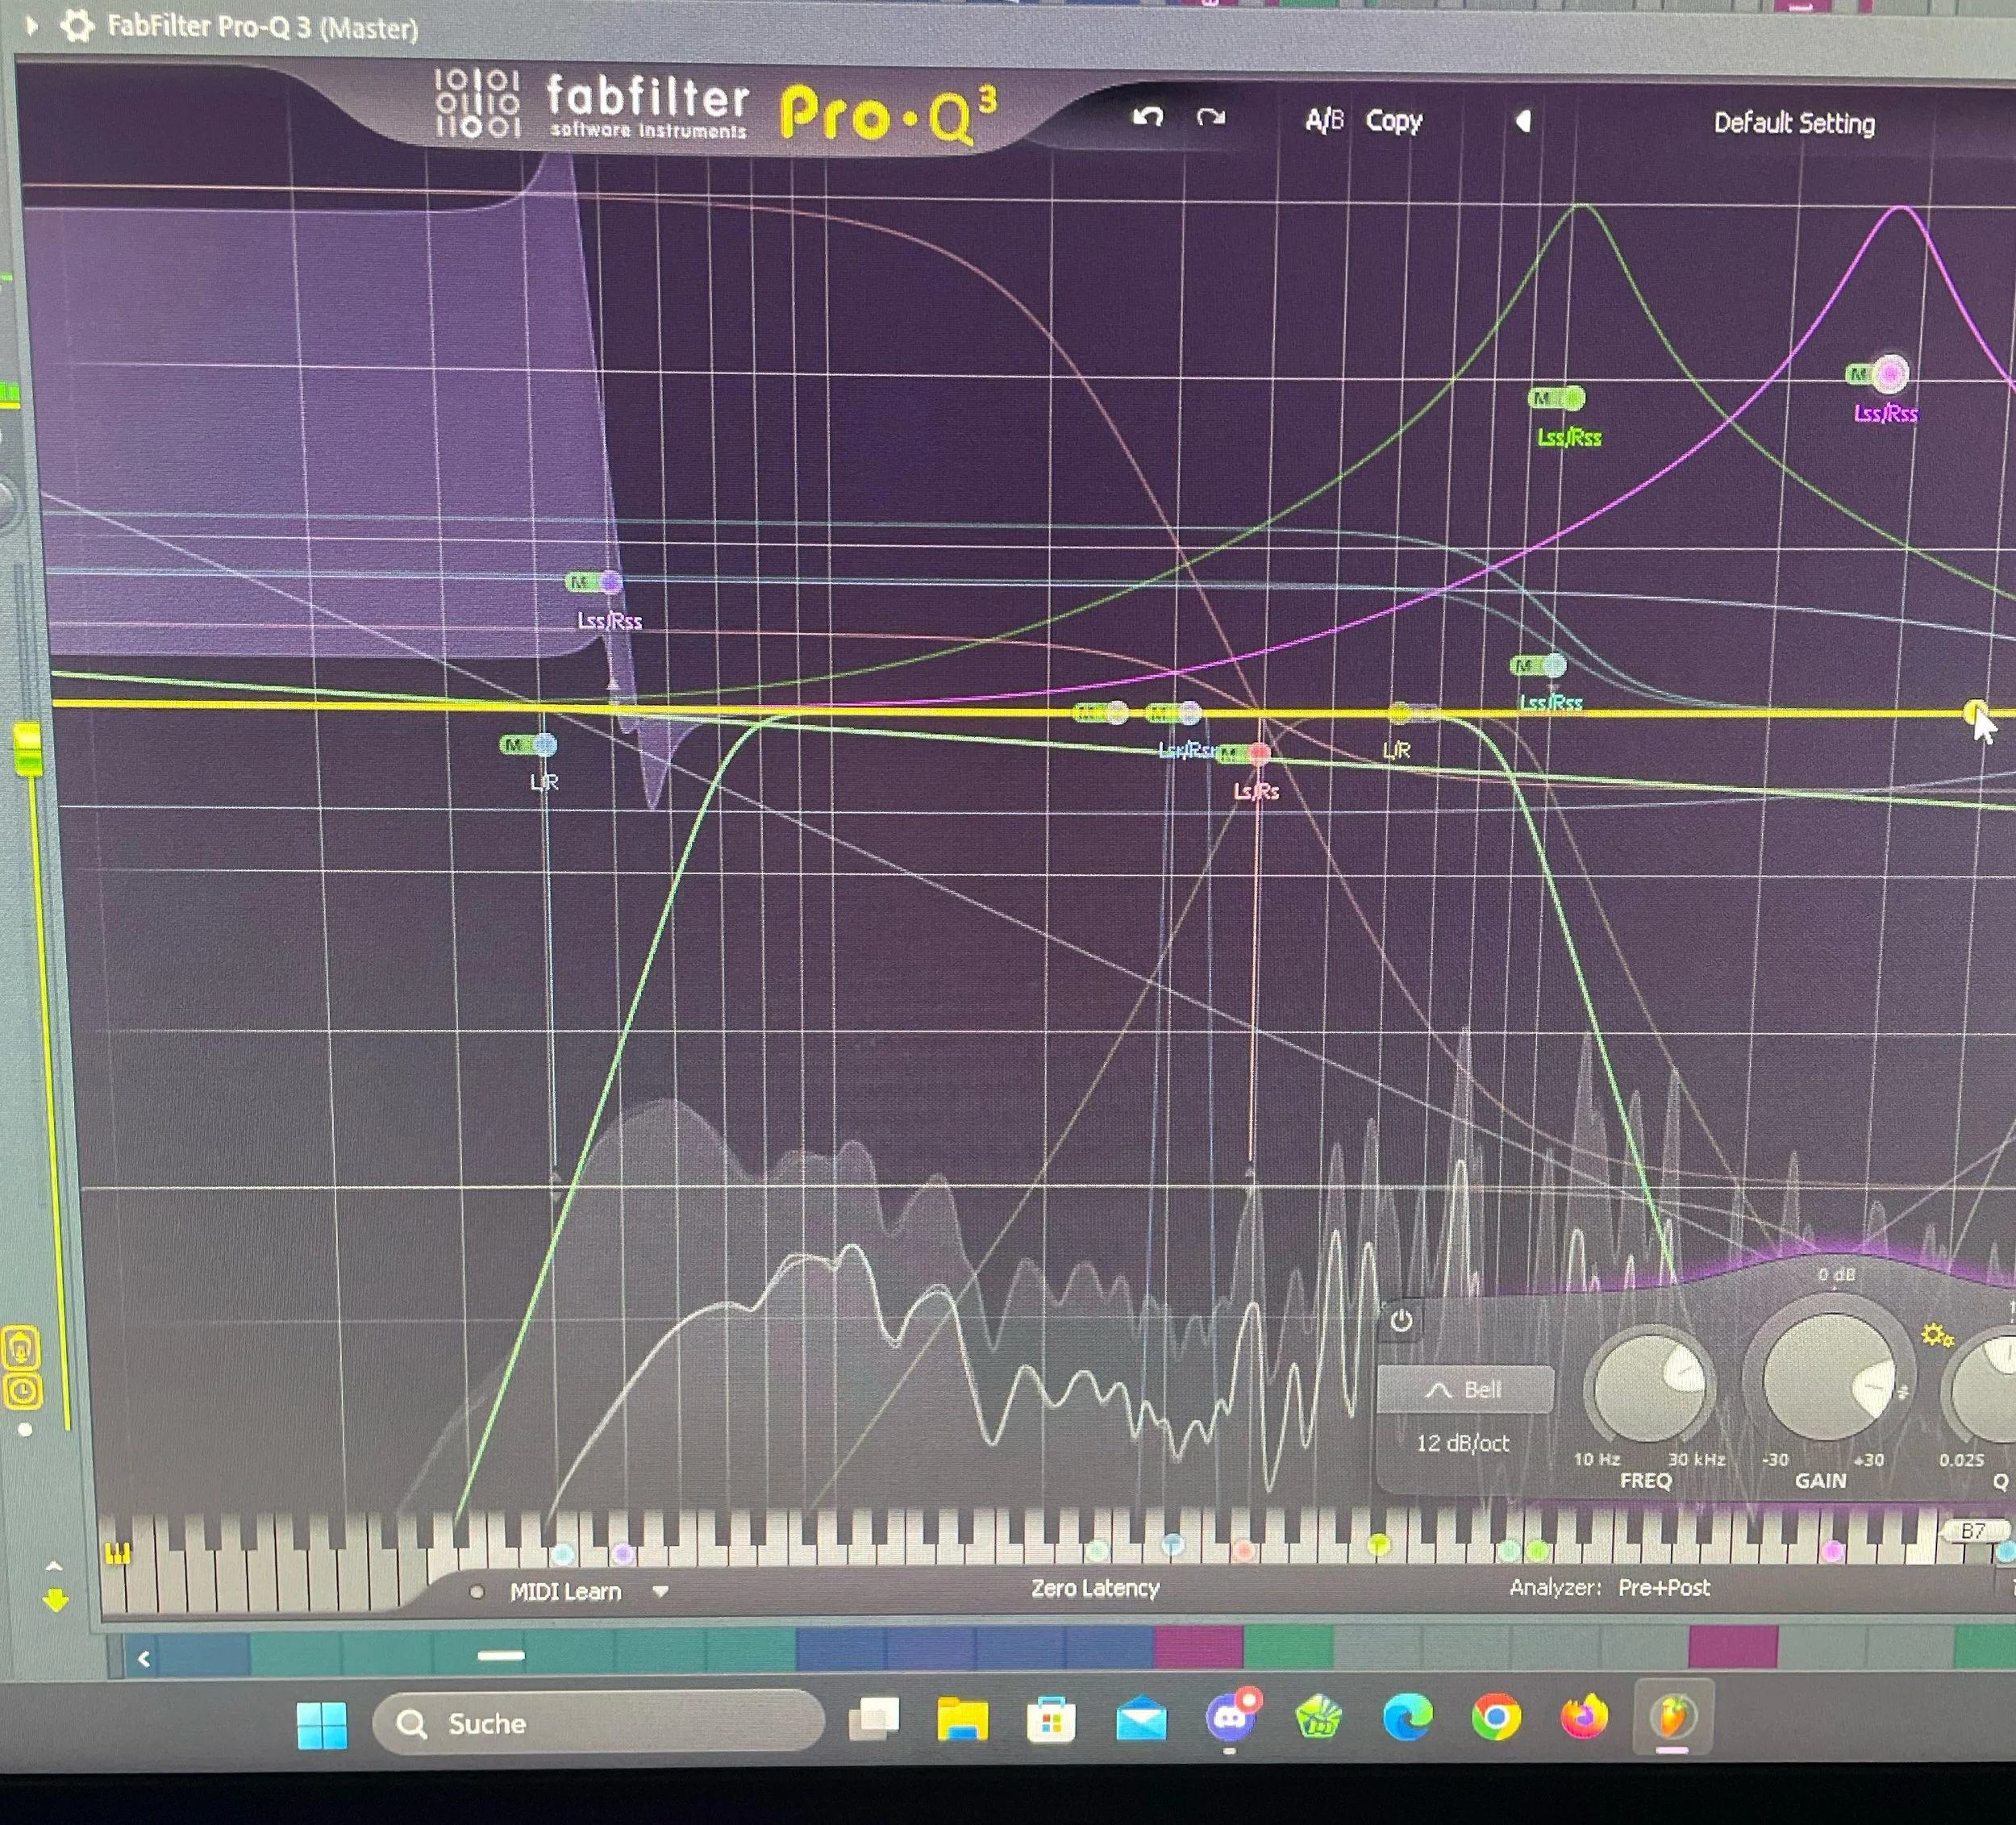
A ridiculous EQ configuration. It’s a joke, but I’ve seen people get uncomfortably close to it.
So here’s the point of the article. The session up there is packed with tracks, but I went easy on the plug-ins, and roughly 80% of my time went into learning how to:
name my tracks, so I can navigate the session instead of hunting through it
group tracks - kick, snare, hi-hat, overheads - so that one VCA DRUMS fader moves the whole kit while the balance I set inside the group stays where it was. It saves a huge amount of time
colour tracks. There are conventions for this too, and they matter most when a session is going back and forth with another engineer - it keeps the session readable and lets you take in a whole group at a glance
clip gain: in the Edit window you’re looking at the waveform of every track, and before any plug-in you bring those levels into a sensible range - roughly consistent from track to track, with plenty of headroom left. Two things come out of that. Level-dependent processors (compressors, saturators, anything modelling analog gear) behave predictably, and you start from a rough balance instead of chaos. Waveform height is a guide, not a loudness meter - a bass and a hi-hat that look the same size are nowhere near equally loud - so let your ears and a meter make the call. Clip gain does more than gain staging, too: pulling down a harsh s before the de-esser, or evening out a performance before the compressor ever sees it.
balancing volume across the whole board, so that I know what the song actually SOUNDS LIKE. It’s five minutes of moving faders, and it’s where you start to feel the song and where the mix should go.
more than that, but nothing I’ve listed needs a single plug-in. It’s understanding the environment you’re working in.
When the mix was finished I built a template out of it - every track already named, coloured, grouped, routed and roughly balanced - so that the next project starts by dropping the new tracks onto their corresponding template track.
That’s my recipe - or rather the recipe I was taught: structure and logic first, so that the creative decisions afterwards have something to stand on. Plenty of my mixes distort, I clip plug-ins constantly, but those are choices I make on purpose, out of experience and curiosity, not accidents I didn’t notice.